
Introduction to Handmade Product Photography Checklist
Photography Tips for Crafters Series – This article is part of my growing collection of photography tips for makers. You may also enjoy:
- How to Photograph Your Creations for Marketing
If you’re anything like me, once you’ve finished making a new handmade creation, you’ll probably excited to get it photographed and listed for sale as quickly as possible.
I’ve certainly been guilty of rushing a little! More than once I’ve uploaded my photographs, only to look at them later and think, “I wish I had taken a little more time with those.”
Over the years i’ve developed a simple checklist that I go through before publishing any of my handmade creations. It only takes a few extra minutes, but it has saved me from having to retake photographs countless times.
I thought I’d share my personal Handmade Product Photography Checklist with you in the hope that it might help you too.
Is My Creation Clean?
The very first thing I do is inspect my creation carefully.
Tiny fingerprints, specks of dust or little fibres often go unnoticed until you see them enlarged on your computer screen.
A quick wipe now saves a lot of editing later.
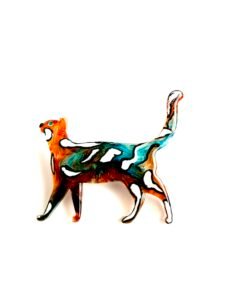
Have I Chosen the Right Background?
Not every creation suits the same background.
Some of my pieces look lovely against a bright white background, while others stand out much better against darker colours.
Before I take a photograph, I simply ask myself:
“Is my creation the first thing my eye is drawn to”
If the answer is yes, then I know I’ve probably chosen the right background.
Is My Lighting Good Enough?
Whenever possible, I still prefer natural daylight.
If its a dull winter’s day, I use the overhead phone mount and ring light that I purchased for my own workbench.
It makes photographing my creations much easier and also helps when filming my craft tutorials.
Here you can see the exact over head phone mount that I use myself.
( Please see my Amazon affiliate links disclosure in the tabs at top of my page)
Have I Taken More Than One Photograph?
I rarely rely on the first photograph that I take.
Instead, I take several pictures from slightly different angles.
Sometimes it’s only is when I compare them afterwards that I realise one image is much stronger than the others.
Have I Shown the Details ?
When you handcraft something, you’ve probably spent hours adding those little finishing touches.
Make sure your photographs show them.
Customers can only appreciate the details they can actually see.
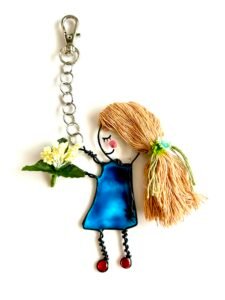
The two images below show one of the characters from my Mary-Anne Collection of bag charms and keyrings. The first photograph is showing the whole figure, whilst the second one is showing facial details and also the flowers in her hair tied with a ribbon.

Would an AI Mock-up Help?
Some creations look wonderful on a plain background.
Others come alive when shown being worn or used.
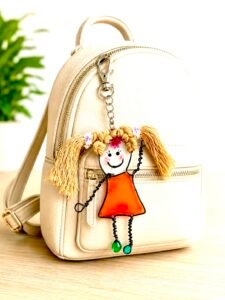
For some of my jewellery and my Mary-Anne Collection, I sometimes create AI mock-up images so people can imagine how they may look in everyday use.
Have I Edited … Without Overdoing It?
I do edit my photographs.
However, I only make small adjustments.
My aim isn’t to change my creation.
It’s simply to make the photograph look as close as possible to the real item sitting on my workbench.
Is There Anything Distracting?
Before uploading, I always have one final look.
A shadow …
A fingerprint …
A stray fibre …
A reflection …
Little distractions can pull attention away from your handmade creation.
Would This Make Me Stop Scrolling?
This is probably the question I ask myself most often.
If I came across this photograph while browsing Etsy or eBay … Would I stop scrolling ?
Final Thoughts
This isn’t the only way to photograph handmade creations.
It’s simply the little checklist that I personally use before publishing my own work.
Hopefully it gives you a few ideas that you can adapt to suit your own style of crafting.
If you would like a more detailed guide, you may also enjoy reading my earlier blog post “How to Photograph Your Creations for Marketing” by clicking this link here.
Helpful Photography Tools You May Like to Consider
Throughout my website I recommend products that I personally use in my own craft room.
However if you are just starting out, there are also a few other photography accessories that many crafters find useful, such as:
A simple phone tripod for steadier photographs.
A foldable photography light box for small handmade items – think I may get one of these for myself
A white photography backdrop for clean, uncluttered images.
Although I don’t personally use these, they maybe worth considering if they suit the way you work.
I do hope you have found this post ‘Handmade Product Photography Checklist’ helpful, and it gives you the confidence to photograph your handmade creations – for selling your crafts.
You can see my next post titled ‘Best Backgrounds for Handmade Product Photography’ right here as soon as it has been published ! Watch this space