
In this tutorial, I’ll show you how to make a UV resin wire bird suncatcher, I combine two crafts in one – UV resin and wire crafting – to create a beautiful handmade bird suncatcher.
I love mixing materials, and this technique works for all sorts of designs like birds, butterflies, flowers and more.
I don’t believe that there are many crafters who only craft with one material, I most definitely have so many different things going on at the same time – if not on my work table then they are ideas in my head.
I am making Hanging Decorations – Sun Catchers, Wall Decorations in bird designs, but you really could do anything – like Fish, Flowers, Turtles or Butterflies the list is endless. This UV resin wire bird suncatcher is a great beginner project and a lovely way to combine two crafts in one.
This post contains affiliate links. As an Amazon Associate I may earn a small commission from qualifying sales at no extra cost to yourself – the funds from this help with the running costs for these tutorials
Materials and Tools Needed
These are the exact tools I use in my own projects and trust
Crafting wire – made in Aluminium this is very bendable this comes in various thicknesses, and colours from basic copper, brass, silver to all colours of the rainbow. You can find the crafting wire that I use here on Amazon
UV Resin – I use Lets Resin that I buy from Amazon, I know I can rely on this resin
Glass Paints – For painting the resin parts I like to use Vitrail Glass Paints these paints give a wonderful translucent look of stained glass effect. Perfect for Sun Catching Decorations. This link is for a set of paints but you can buy individual pots too
Pliers / Cutters – You really need a pair of nice sharp snippers and jewellery making pliers, also a pair of soft jaw pliers so as not to mark your wire.
UV Light – Of course if you are using UV resin you WILL NEED a UV Lamp – This is the one I personally use
UV Torch – I like to use my UV Torch, as you will see in many of my videos, it is a very handy piece of kit I do recommend this one from Amazon
Resin Tape – needed to add resin to the wire shape buy here at Amazon
How to Make a UV Resin Wire Bird Suncatcher
Getting Started
First of all decide what shape you would like to make, I suggest starting as simple as possible, but still choosing a shape that excites you, I find a basic bird shape is ideal.
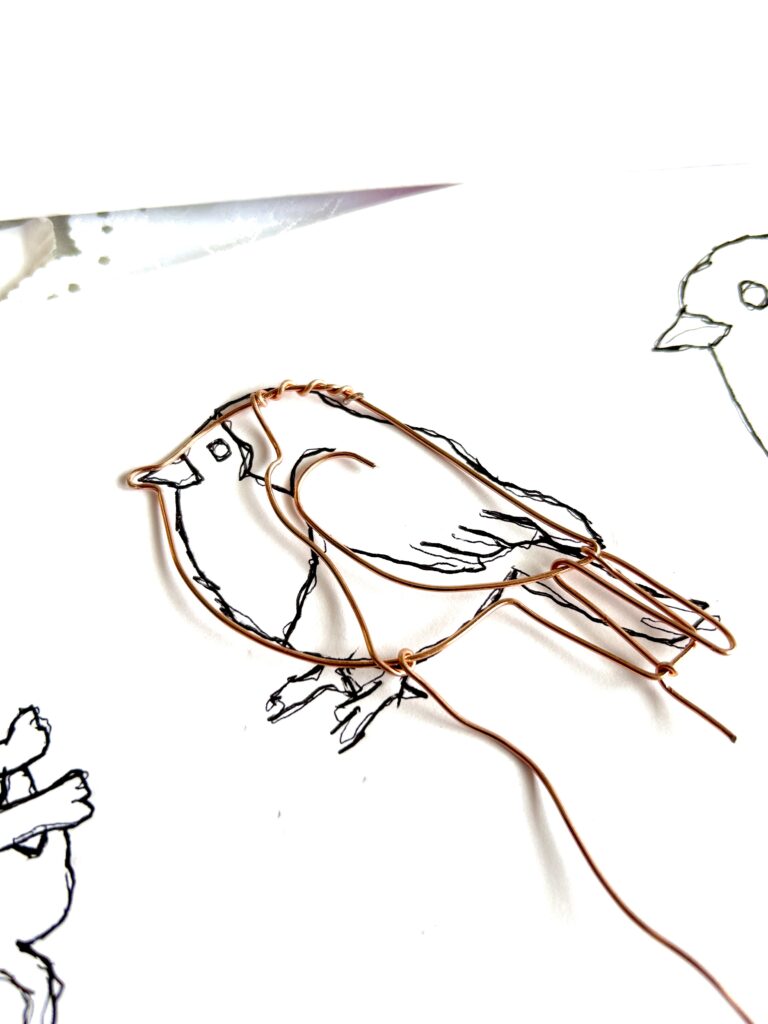
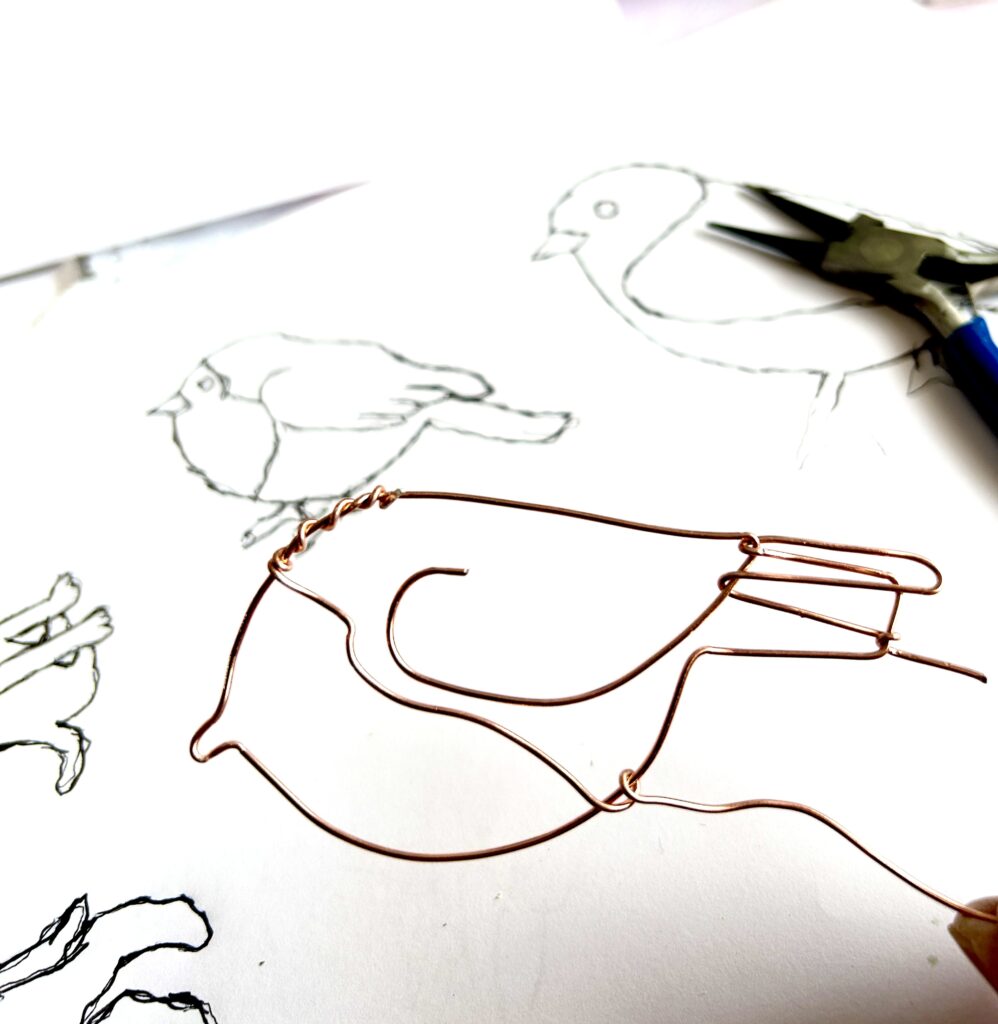
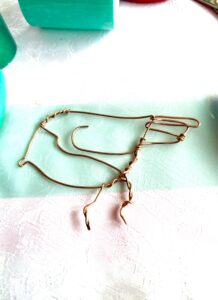
Cut a length of wire I am using 1.5 gauge copper wire here, find your starting point, and simply follow your outline sketch with the wire, bending and twisting as you go, I use my pliers and also anything to hand with a curve edge to help me shape the wire. It is sometimes a bit tricky but with practise it will become much easier.
If you’re new to wire crafting, don’t worry about perfection, slight imperfections actually add character to handmade pieces.
It does NOT have to fit you sketch exactly you are just looking for a rough outline that is recognisable as a bird shape.
When you are satisfied with the shape – secure the end by wrapping the wire around with your pliers. You can then continue to shape your bird if you need to.
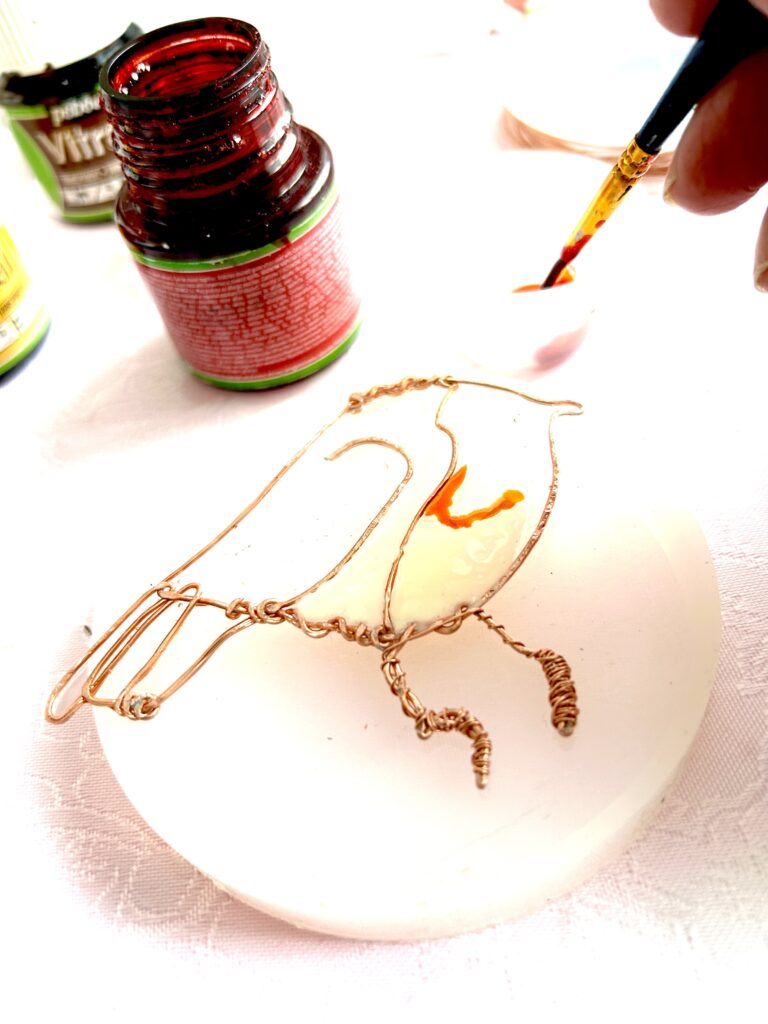
Adding UV Resin
Now we need to add UV Resin to the shape, and before we do this, Resin Tape must be applied to the bird. When working with UV resin, it’s best to build up in layers rather than pouring all at once.
It is difficult to get the tape really well stuck to the wire bird, I sometimes use a small hammer and gently hammer it down. Now adding the UV Resin I tend to add resin to individual areas because of the risk of the resin leaking under the wire if I just poured the whole bird in one. So this is where my UV Torch comes in handy because you can cure a small piece very very quickly before it has a chance to run everywhere – again practise makes perfect. So I cure first with my UV Torch BUT then I place the wired bird under my UV Lamp for a few minutes to cure fully.
In this next video you can see me removing the resin Tape – It is a different bird but the same method
https://youtube.com/shorts/cwkR9PYqVAE
Painting
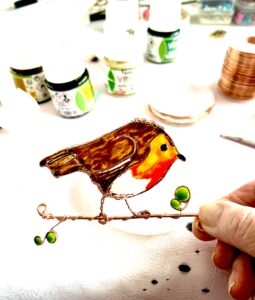
Your UV Resin Wire Bird is now ready for you to paint – I like to use Specialised Paints, by Pebeo, Vitrail Stained Glass Effect. Glass paints create a stained glass effect, which is perfect for suncatchers as they catch and reflect the light beautifully. Vitrail paints come in a wide range of colours. You only use a little so a small pot goes a long way. I only paint one side because obviously you can see the colours on both sides.
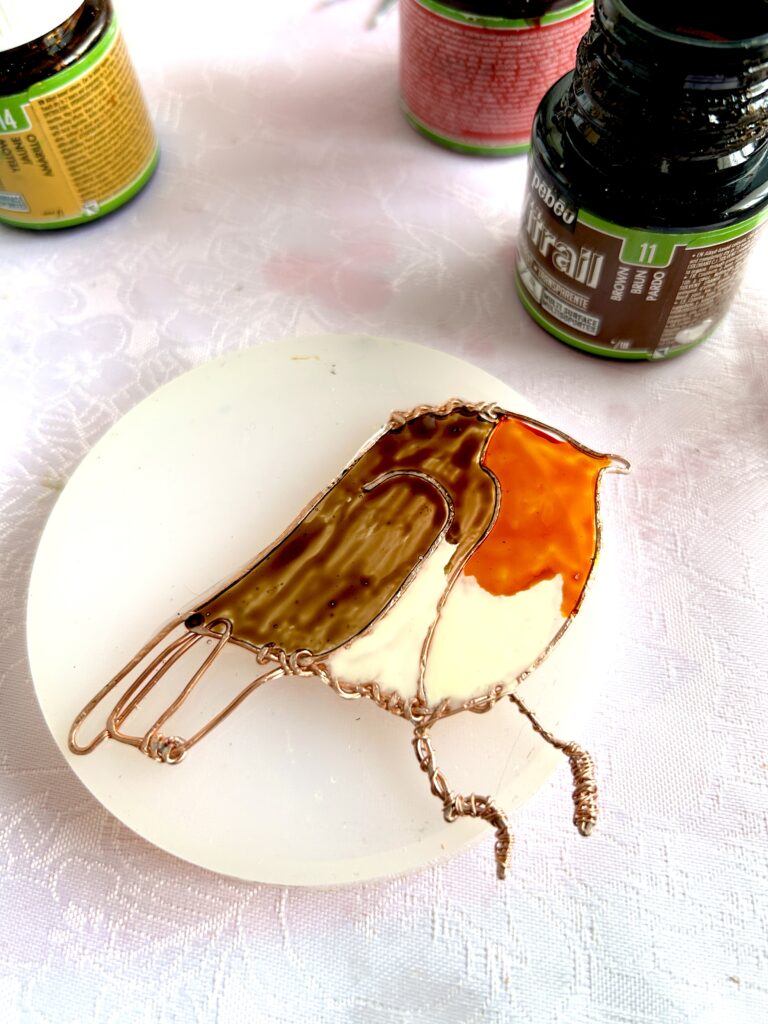
Finishing Touches
I have added a copper branch for my bird to stand on slightly thicker gauge wire, and drilled a small hole with the Dremel to attach a hanging wire. Once finished, your UV resin wire bird suncatcher will catch the light beautifully in any window.
You can hang your finished piece in a sunny window or conservatory where it will catch the light beautifully.
If you enjoyed this tutorial, you might also like my other resin and clay projects here.
And if you’re looking for the tools I use, you can find them all on my Tools and Materials page