
What does Doming mean?
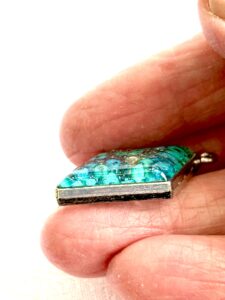
Doming with UV resin is a process of building up layers of resin on a flat surface until you have created a dome shape, but doming is not always aiming at a typical dome shape – it can be merely putting a thicker layer over a flat surface so it is visibly slightly raised, like in this image below.
This post may contain affiliate links. As an Amazon Associate I earn a small commission on qualifying purchases at no extra cost to you
It really is your personal choice and depends on the piece you are making — so I guess what I am saying is that there is ( in my opinion) no real right or wrong way of doming. But here in this post I will give you some basic guidance and tips for you to try out on your own pieces, and you will develop your own preference for the look that you would like for your pieces of resin, being UV resin I would assume you are working with items like jewellery, key rings, book marks or other smaller items.
Obviously you need UV resin – BUT which one?
- Low Viscosity: This resin is thin and watery. It moves quickly and seeks its own level.
- High Viscosity: This resin is thick and syrupy. It moves slowly and tends to hold its shape.
Most resin crafters will suggest a High Viscosity Resin which is a bit thicker, a bit like pouring honey, it does help because it is less likely to run over the edge. I however tend to use Low Viscosity-the same resin I use for making my jewellery, I am not usually aiming at achieving a high dome on my pieces and I have become quite comfortable doming with this thinner resin. I overcome the ‘running over the edge situation’ by using my UV Torch which you will see me using in the video this cures the resin as it reaches the edge preventing it from running over.
With your safety gear on (Nitrile Gloves and Mask, maybe an Air Purifier too, I have one on my work table) Start with pouring a small amount of your resin onto the centre of your piece and gently guide the resin out to the edges using a cocktail stick, lolly stick, silicone stirrer, or what I use silicone brush tips. Your guiding it to the edge but you don’t want it to go over the edge – you need to take our time with this, you really can not rush this process. I like to work mine under a desk light and turn the piece frequently as I go, because it may look like it is all covered, but the light reveals areas you have missed, so my personal tip is take your time and turn your work frequently as you go. Keep layering and curing until you are satisfied with the result.
Do you have to Dome every piece you make – No you don’t, like I said earlier its personal choice, some pieces look really nice being left flat and level.
And Now Part 3 ( sorry there was not any room to include the third video here ) the final video in this tutorial Doming with UV Resin Can be Seen in my next blog – view here
There are links to all tools and materials you see me use in my videos on my tools page