
You’re right at the fun part, let’s turn “I hope this works” into “I know what I am doing” with this beginner guide to crafting with UV resin
- Gather your basic supplies
You don’t need everything, just the essentials:
- UV Resin: A clear UV resin suitable for jewellery and crafts ( I always use Lets Resin)
- UV Lamp: Ideally 36W or higher ( If you purchase a Lets Resin Starter Kit – a Lamp is included as are all the other bits and pieces. You can see this starter kit here on Amazon I think it is a really good starting point. 💖
- Molds or Bezels (unless you have the starter kit above ) If using an open backed bezel you will also need resin tape.
- Mixing Tools: Silicone sticks or wooden toothpicks
- Protective Gear: I do recommend that you see my post on Safety with Resin here before you start to craft
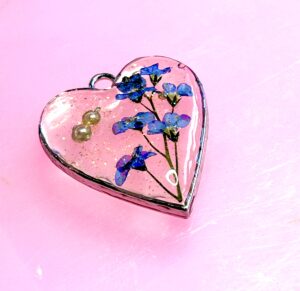
- Extras: Glitter, dried flowers, charms, mica powder, stickers etc..
- Cleaning: Isopropyl alcohol spray and wet wipes for cleaning spills and bezels
2. Prepare your Workspace
Spending some time ensuring everything is set up right for you first – means you are less likely to run into problems later
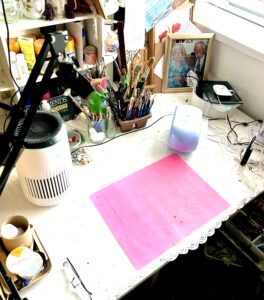
- Cover your Table with a silicone mat or baking paper
- Reduce Dust Wipe the area and keep pets / hair away
- Position your Lamp, Tools and Wipes close enough to reach easily
3. Clean your Molds or Bezels
Boring yes, but it is important if you want good results
Bezels : Wipe with Isopropyl Alcohol to remove oils and finger prints
Silicone Molds : Check for dust, glitter or old resin bits and use tape to lift off any tiny bits if needed
Clean surfaces help to prevent your resin pulling away from the edges or curing with random unwanted specks.
4. Plan Your Design First
Before you even open the bottle – and yes I know you can’t wait to do so, BUT decide :-
- What are you making ? – A Charm, Pendant, Keyring etc ..
- What’s going inside ? – Glitter, Flowers, Stickers etc..
Having a rough plan stops you from overfilling or panicking mid-pour.
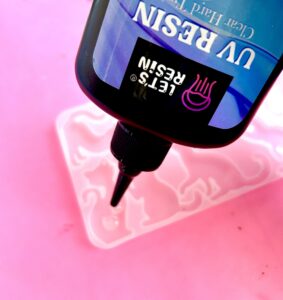
5. Add a Thin Base Layer of Resin
And here you are actually starting to craft with UV resin! 😀
- Squeeze a small amount of resin into the mold or bezel
- Keep it thin just about 1-2 mm (this all depends on size of mold or bezel you are using )
- Use a silicone stick or toothpick to spread the resin out to the edges evenly
- Check for bubbles and pop them now with a toothpick or silicon tool – you can also use a long nosed lighter and move the flame gently over the top of the resin (not touching ) and the heat from the flame will burst the bubbles – I find this bit quite therapeutic
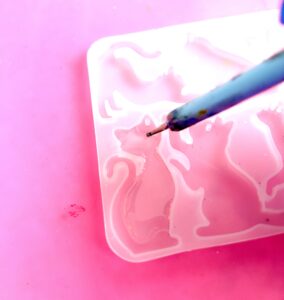
Don’t rush to fill all at once, thin layers cure better and stay clearer.
6. Cure The Base Layer
- Place your piece under your UV Lamp
- Cure for 60-90 seconds
- If it still feels soft or tacky , cure for another 30-60 seconds
7. Add Decorations – This really is the FUN part
Building Your Design:
- Put your dried flowers, glitter, charms etc. onto the cured base
- Use tweezers or toothpick to move them around to where you would like them to be.
- You can add a tiny bit of resin to fix the pieces in position and cure for a few seconds to lock them into place
TIP: Try not to overload, as too many items can trap bubbles, this is a common mistake when just starting out crafting with resin, its so easy to get carried away with it. Too many items can look messy .
8. Add more resin in layers
You are now building up your piece
- Add another layer of resin over your decorations
- As before pop any bubbles as they appear
- Cure again for 60-90 seconds
- Repeat layers if you are looking for a more domed top
Always think: Thin layer – Check bubbles – Cure – Repeat
To Create a Smooth Glossy Top ( Doming) please take a look at a post I published earlier on Doming you can see it here
9. Final Cure and Inspection
- Give your finished piece a longer cure 2-3 minutes under the UV lamp
- Then allow it to cool for a few minutes
- Keep it in the mold (if using a mold) and CHECK: – Is it fully hard? Any sticky spots? or any missed bubbles or dust?
If there is a slightly tacky area – add a very thin top coat of resin and cure again.
10. Demolding and Finishing
How exciting is this moment?
- Gently pull back the mold away from you piece
- If the edges are sharp you: Lightly sand with a fine grit sandpaper, and then put a thin layer of resin over the sanded bits and cure again, or use a special tool for deburring which you can see on my tools and materials page here
If you used a Bezel: Check the back, if its uneven , you can add a thin layer of resin to flatten it and cure again
11. Adding Jewellery Findings or Keyring Chains:
You will see in your molds there is a little post sticking up this post is what makes the little hole in your piece to enable you to add a jump ring etc. . so as you can fit earring wires, or a chain to a pendant or keyring – The Lets Resin Starter Kit that I talked about at the beginning of this post does include all these fittings within the kit which again I believe is good value and well worth considering when you are just starting out on your crafting with UV Resin.
And so now you will have completed your very first piece of crafted resin, with this step-by-step beginners guide to crafting with UV resin. I do hope all went well for you but please don’t be put off if it did not go so well the first time – I promise you it will become easier with more practice the main things to remember is :-
- Set up SAFELY – see my safe setup post (link)
- Don’t try to Rush the process
- Always pour in THIN layers
- Deal with any Bubbles
- CURE well in-between layers
Pop back here to my site from time to time, I do try to cover in my posts the most common problems, that can occur while crafting with resin, that you may find helpful.
Some of my posts may contain affiliate links. This means as an Amazon Associate I earn a small commission from any purchase at no extra cost to yourself