
Lets have some fun and create Bees and Bugs using UV resin
I love making these little creatures it gives me that feeling of being closer to nature, so if you are anything like me and love wild life and nature I am sure you will enjoy this project.
This post may contain affiliate links see my full Amazon Affiliate Disclosure here
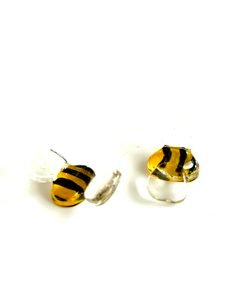
To Create the bees and bugs I use just one mould, which is fast becoming my favourite mould as it seems to have the capability of creating so many different pieces – you just need a little imagination putting pieces together and seeing what they can become. These bees and bugs can be used for embellishments on other craft items or you could even make jewellery with them like a lovely pair of bee earrings.
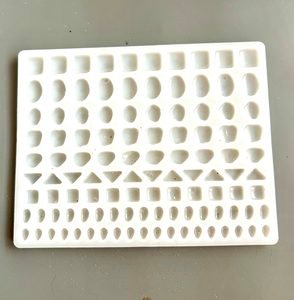
This is the mould that I use to make my bees and bugs that you will see me using in my video tutorial, its from Amazon you can see it right here
Lets Get Started:
You have your mould, your UV resin and a UV lamp or UV torch ✅
So first of all, you need to fill the nuggets in the mould with your resin, for the bees and bugs bodies, I use the oval shape in the 2nd row on the mould, fill to top with clear resin and cure.
Once fully cured and removed from the mould, you can start painting. I like to use transparent glass paint on resin – I find it gives a wonderful glass like finish, but you could also use acrylic paints, or even acrylic pens, there are so many different types of ‘paint pens’ around now, so use whatever you have to hand, or what fits your crafting budget. I probably started using glass paints as that was a past craft of mine painting glass bottles.
Black and White Colour:
For the black and white, I use a resin epoxy paste that I mix with the UV resin – I just find it easier to add to my designs and it gives a good finish, and you can cure it, so as you are not waiting around for paint to dry. – You will see me doing this in the tutorial video. You can see details of all materials I use later in this post.
Painting
Obviously for a bee you will paint black and yellow stripes – you want to remember to have black at the head end, and finish with a yellow. Allow one colour to dry completely before adding the other, to avoid paint runs. For the ladybird you will use red over two thirds and do one third in black for the head and don’t forget to add the all important spots!
I think we should watch the video now and I will talk about the finishing details after …
As you could see in the video – it can get quite fiddly adding the wings to the bees, and this is the sort of situation where the UV torch really helps. Using a UV Torch enables you to hold something in place, while you ‘zap’ it with the torch – so much easier and quicker than trying to get this under a UV lamp.
So for the wings – I used the next row on the mould (I have also used the shape in the forth row down, for wings too, so its your personal preference really) these shapes are a little irregular and make perfect bee wings.
I leave them as clear resin but you could colour lightly if you wanted to, I also don’t fill the mould right to the top, for the wings, as they look more effective I think, being a little thinner.
Silicone Stick Tools
I find these tools so useful for many of my crafts, from applying resin, to painting and I highly recommend them to anyone crafting, especially with resin, although they are actually intended for use with clay.
You can see the silicone tool kit that I personally use for my crafts right here
I use these tools for adding eyes to bees and bugs, I use a tiny spot of white epoxy paste, that I apply with a silicone stick tool just as I do the Ladybird spots – but with a finer stick – you could also use a cocktail stick.
Other Pieces to Make with this Mould
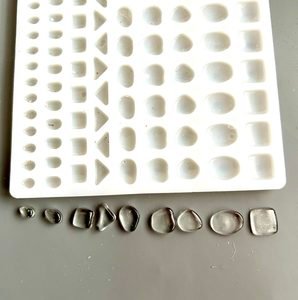
Do play around with the shapes that you can make with this mould, the nugget that makes the bees and bugs also make great flowers if you put 4-5 together, and butterfly wings too – a little imagination, a bit of paint it is quite surprising what appears before your eyes.
My Tools and Materials
I do add links here and there to help you find the exact tools and materials you see me using in my videos, but you can see ALL MY TOOLS & CRAFT SUPPLIES HERE and a link to my Amazon Shop Front.
Please do feel free to explore my previous posts from what do you need when starting out with resin crafting, staying safe with resin, troubleshooting tips and advice to seeing some of my own creations you can see them all right here