
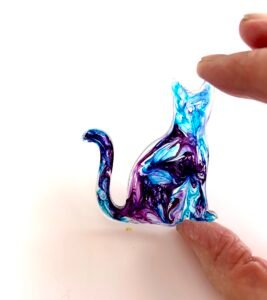
In this post I will show you just how to create a cute cat brooch pin in easy to follow steps, I enjoy making these cats as each one is unique, you never really know just how it will turn out until it is removed from the mould.
What you will need to create your Cat Brooch Pin
Safety equipment ( gloves, mask) / UV Resin / Cat shaped silicone mould / cocktail stick or silicone tip tool / resin dyes (2 colours) / UV lamp /brooch pin fastener
If you want to take the design further at the end as I do then in addition to the above you will also need white pigment paste / black acrylic marker pen / thin clear nylon cord (for whiskers) and tiny sparkles.
I will add links for all items needed at end of this post. As an Amazon associate I may earn a small commission on any qualifying sales via links to products in this post, at no extra cost to yourself this helps to fund my website with free tutorial videos and troubleshooting tips.
Ok Lets start by watching my ‘You Tube’ video first and then you can follow my step by step guide below to create your first cat brooch pin.
Ok now you have watched how it is done and have seen the end results – you can have a go at creating a cat brooch pin by following these steps – you can always pop back to the video if you are unsure about something.
Think Safety First – always ensure you are working in a safe area with appropriate protection such as gloves & mask you can see my safety work space set up here if you are unsure
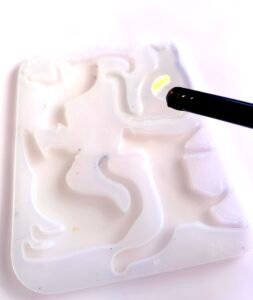
Step 1: Fill your cat shaped mould almost to the top with clear UV resin, guide the resin into the smaller areas with a cocktail stick or silicone stick ensuring the resin reaches all areas of the cat mould, use a long nosed lighter if you have one to clear any small bubbles if you want to – but this is not essential.
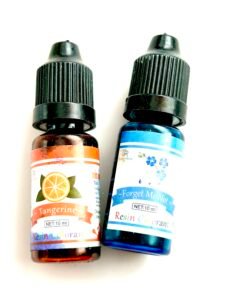
Step 2: Choose two colours of resin dye and add a few drops of each directly on top of the resin you have just poured ( it will float on top) you may notice the colours start to spread and move on the surface of the resin this is the fun part watching to see what happens naturally. Do not add too much just one or two drops of each colour at a time – you can always add more if needed but if you put in too much to start with the colours may go muddy and also you may have problems with it curing fully, so just a drop or two – less is more when using resin dyes.
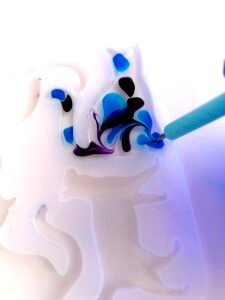
Please note: This image is showing the swirling method, but with different colours and mould to those in the video.
Step 3: Its swirling time, with your cocktail stick or silicone tip stick start to swirl your colours – move them gently through the resin mixing together some times – just swirl until you are happy with the appearance and then CURE – under a UV lamp for 3- 5 minutes – but follow your UV lamps manufactures recommendations.
Step 4: Remove from the mould ( once cooled) and there you have your first resin CAT, how cute is that? Now you can simply finish here by adding your brooch pin, I usually attach my brooch pins with a little drop or two of resin and cure but you could use a strong glue if you wish.
Now if you want your cat brooch pin to stand out a little more from the crowd – then after removing from the mould you can follow these next steps.
Step 5: Mix up a little white pigment paste with UV resin to make a white backing layer for your cat brooch pin .. Why ? because sometimes the brooch fastener can be seen from the front of the brooch if there is not enough colour to disguise it, putting a white layer on the back solves this problem.
Step 6: Apply your white backing layer – I did write a blog post on applying a white pigment layer – if you missed it you can watch here – pour some of your mixed white pigment onto the back of the cat- (its your choice which is back or front ) and gently spread it out to the edges until all the cat is covered and then cure under your UV lamp again.
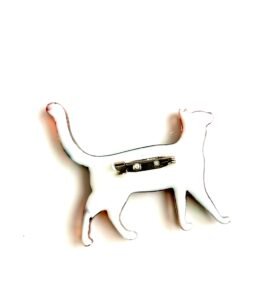
Step 7: A final pour of UV resin over the white layer ( this gives a nice glossy smooth surface) but before curing, place the brooch fastener into position and CURE … the brooch pin will now be secured.
Again you could stop at this point as you have a perfectly beautiful cat brooch pin – BUT as you saw in the video I went a step further again … and added more detail, so if you wish to, you can follow the next step.
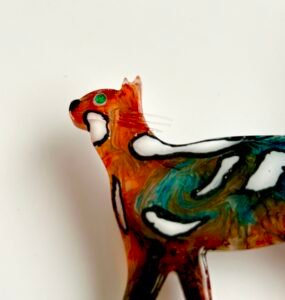
Step 8: Using my silicone stick I dipped it into the ready mixed up white pigment paste and outlined some of the swirl patterns, I also used a black acrylic marker and out lined more swirls. I added tiny sparkles for eyes ( you could do this with a marker pen) and nose, and then for whiskers I used clear nylon cord stuck into place with a little drop of resin and cured – once your happy with your patterns apply a final top coat of UV resin very carefully and CURE for the very last time.
A cat brooch pin is so popular as they make great gifts for cat lovers, I also make them into keyrings or bag-charms, You do not have to use resin dyes and swirl designs you could use a solid colour right through maybe with mica powder or you could leave it clear with maybe just a few dried flowers or foil flakes within the resin there really is so many different ways of creating a beautiful cat brooch pin – so let your imagination flow freely I hope I have inspired you – have fun crafting.
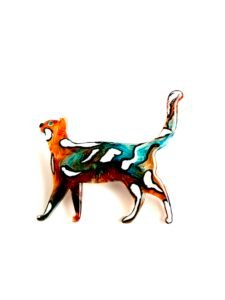
See list below of all materials and tools I used to create this cat brooch pin
For safety Equipment please see my post on safety with resin
UV Resin – I use Lets Resin but of course you can use any brand of your choosing
Cat Silicone Mould – This one actually comes with the brooch pins
Silicone Tip Tool – I find these so useful when crafting with UV resin
Resin Dyes – These are the ones I personally use
UV Lamp – I don’t actually use this lamp BUT, as mine is getting rather old now I am thinking of buying a new one and this will be my choice.
White Pigment Paste – Remember you only need a tiny amount of this
Black Acrylic Marker Pens – These are great for adding detail to resin pieces
When it comes to sparkles and nylon cord I don’t have links for these as they are items I have just collected over the years but I am sure they can be found on Amazon – sometimes they are included in resin starter packs.
If you have found this post interesting and hopefully inspiring you may like to see other posts I have written – you can catch up with them right here I do post on a regular basis, so please do keep popping back – thank you for watching and hopefully sharing my posts too.